
October 30
14 min. to read
How To Take Pictures Of The Moon With Smartphone And Keep Detail
Moon photos go wrong for the same simple reasons—the Moon is tiny in the frame, blazing bright against a dark sky, and phones try to “average” the scene. The good news: with steadier technique, slight exposure tweaks, and a smarter workflow, you can take picture of the moon with phone and keep the craters crisp.
This guide provides a step-by-step guide on how to take a picture of the moon with your phone, using settings compatible with both Android and iPhone, all without needing a telescope.
Why the Moon Looks Flat on Phones and How to Fix It (Timing, Distance, Stability)
 Phones compress dynamic range. They brighten the sky, dim the Moon, and smear fine texture with noise reduction. Two changes solve most of it:
First, shoot during moonrise or moonset when the Moon sits lower—atmospheric dimming makes it less blinding and easier to expose.
Second, stabilize like you mean it. Brace the phone on a wall or railing, use a mini-tripod, and trigger the shutter with a timer or remote so micro-shake doesn’t erase crater detail.
Underexposure is your friend. Tap to focus on the Moon, then drag the exposure down until edges look silvery rather than pure white. Start around −1 to −2 EV; on manual apps, try ISO 50-200 and shutter 1/250-1/500 for a bright Moon.
Avoid aggressive digital zoom. It magnifies blur and sharpening halos. Instead, shoot at 1× or the optical tele lens, then crop in post. These habits quickly improve how to take a picture of the moon with your phone without any exotic gear.
Gear and Setup for Android and iPhone
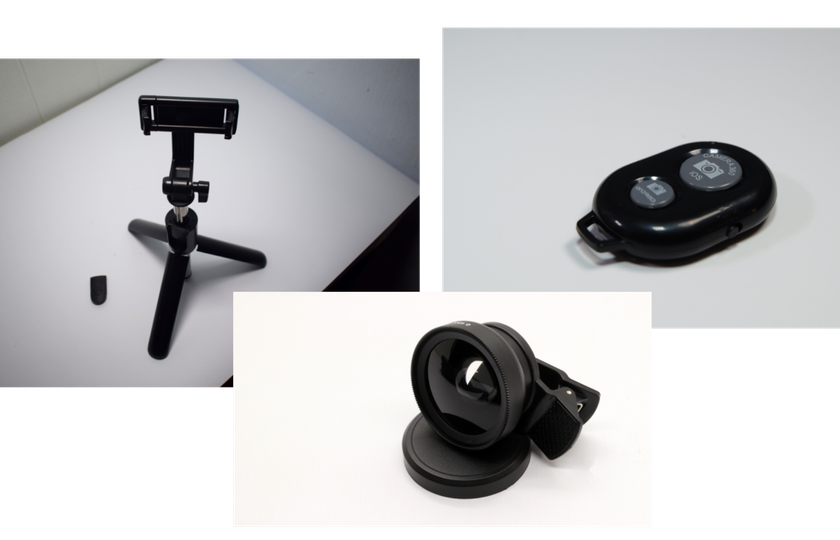 You don’t need a telescope, just the right small accessories and a clean setup that keeps the image sharp.
Stable support—a compact tripod with a clamp, or press the phone flat against a railing or window ledge.
Hands-off shutter—3-10 s timer or Bluetooth remote to prevent micro-shake.
Lenses—use the main wide lens at 1× for the cleanest sensor, or the phone’s real tele module if it’s optical; skip digital zoom.
Exposure control—any app that lets you lock focus and dial exposure down a stop or two.
RAW capture—enable it on models that support it to preserve highlight texture.
Android users benefit from a capable editor right on the device. After capture, tasks like gentle de-noise, targeted sharpening, and subtle contrast are much easier with a good photo editing app for Android—that way you can crop tighter without turning the Moon into a crunchy halo.
Choosing gear is similar for iOS and Android, but when comparing devices, look for a larger sensor, a true optical tele, and reliable manual or RAW control. Those are the traits behind the best phone to take pictures of the moon for most people.
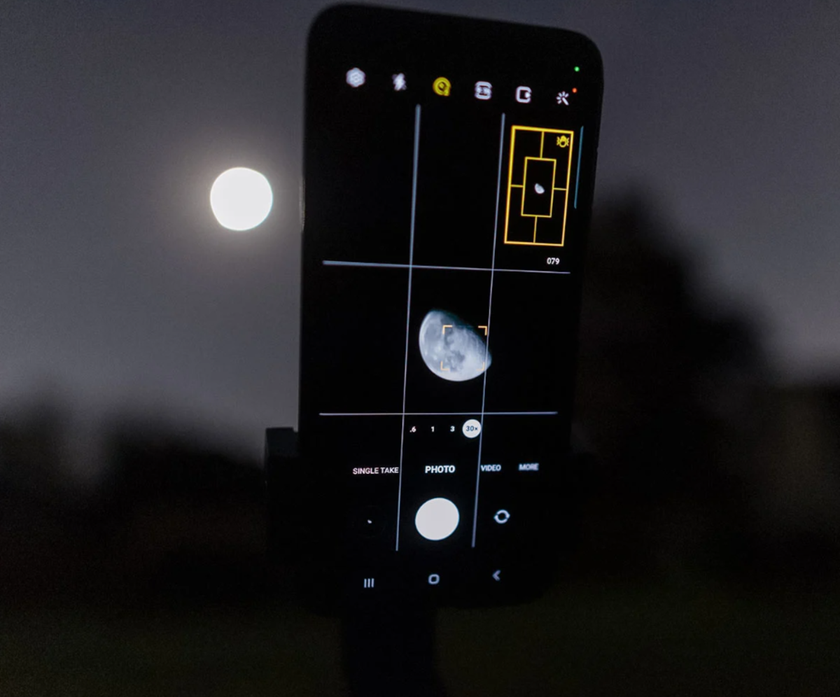
How to Take Pictures of the Moon with an Android: Practical Settings That Work
 Android gives plenty of control, which is exactly what the Moon needs. Open the stock camera, switch to the main 1× lens or a real optical telescope, and tap the Moon to lock focus. Slide exposure down until the rim shows texture.
For manual apps, a reliable starting point is ISO 50-200, shutter 1/250-1/500, and daylight white balance; nudge the shutter slower only if the frame is too dim. Use a 3-10s timer, so the phone settles before the shot.
RAW helps when your device supports it. It preserves highlight detail that JPEG would smooth away, so crater edges survive editing. Avoid digital zoom—frame wider at 1× or telescope, then crop later. If the air shimmers, wait out the gusts or take short bursts and keep the sharpest file.
These phone camera settings for moon photography hold up because they box in brightness and cut motion blur. Once they’re dialed, bracket a few frames at −1, −1.7, and −2.3 EV. That tiny range often separates “bright blob” from sculpted craters and maria. With practice, this is how to take pictures of the moon with Android that look clean rather than crunchy.
iPhone Specifics for Sharp Lunar Shots (Focus, Exposure, RAW)
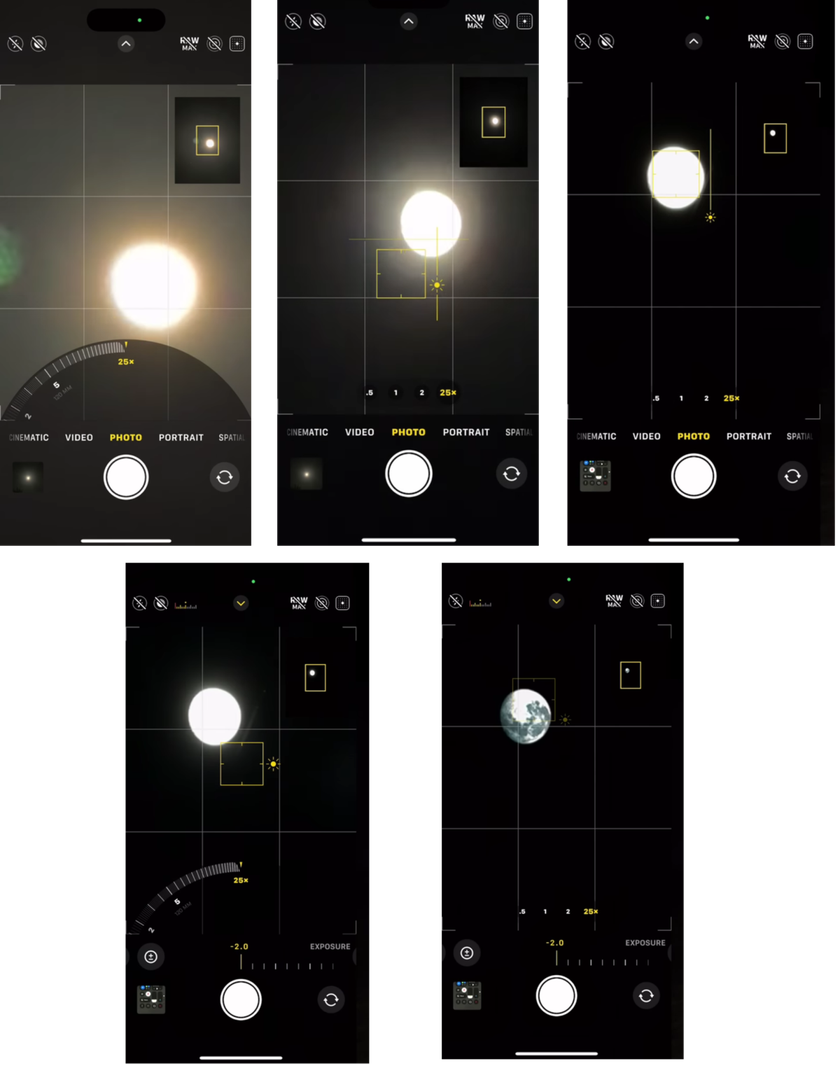 On iPhone, start with the telescope module if your model has one; if not, stay at 1× for the best sensor. Tap-hold on the Moon to lock AE/AF, then drag the brightness slider down until the disk stops glowing.
For Pro models, enable ProRAW and set 24 or 48 MP so micro-details survive the crop. Third-party manual apps let you pick shutter and ISO directly; try ISO 64-200 and 1/250-1/500, then fine-tune by a third of a stop.
Stability matters more than Zoom. Brace the phone, use a timer, and fire a short burst—tiny variations in air and hand movement can blur a single exposure. If you plan to add stars or foreground later, keep one darker frame to protect the lunar highlights.
Want a deeper night-sky playbook on iOS—framing with wide lenses, focusing at infinity, and balancing sky color? See these hands-on ideas for astrophotography with an iPhone to extend the same discipline beyond the Moon. With exposure under control, iPhone files hold more texture than most people expect.
Shooting Workflow: How to Photograph the Moon With a Cell Phone
 Once outdoors, keep a simple routine. This is how to take pictures of the moon with cell phone while holding onto fine texture:
Stabilize the phone on a tripod or solid surface, then use a timer or remote.
Choose 1× or an optical tele; skip digital zoom.
Lock focus on the Moon and underexpose by about one stop.
Shoot RAW when available; otherwise, save the brightest clean JPEG and a darker safety.
Take a short burst or three brackets; later, pick the sharpest, most detailed frame.
Leave room to crop—composition is easier in edit than at 20× digital zoom.
This second, repeatable list is the difference between guesswork and a controlled capture. In the next section, we’ll develop those files so contrast pops without halos, using gentle de-noise, smart clarity, and targeted tools like dehaze a photo when the sky looks milky.
Post-Processing—Actually Reveals Texture
Good capture is half the job; the other half is a careful edit that respects highlight detail. Start by setting the white balance a touch cooler, so the Moon loses its yellow cast. Add a little mid-tone contrast, then work locally—a small, targeted clarity or structure mask over the maria and crater rims does more than global sharpening ever could. If haze or light pollution washes out edge contrast, until the limb looks etched, but the sky stays smooth. Keep luminance noise reduction modest so micro-detail survives.
When the frame is strong but tiny in the composition, upscale carefully before final sharpening. A dedicated 4k photo enhancer can lift resolution for social crops or small prints without turning rims into stair-steps. Finish with a small-radius, low-amount sharpen and a gentle vignette to keep attention on the disk. This is where many attempts to take pictures of the moon with phone cross the line from soft to sculpted.
Step-by-Step: How to Edit Moon Photos for Real Texture
Good capture is only half the job — the real magic happens in post. Here’s how to refine your moon shot without losing those delicate craters and edges:
1. Adjust white balance: Cool the temperature by about 200–800 K to remove yellow tones and make the Moon appear more neutral gray. Avoid green or magenta casts.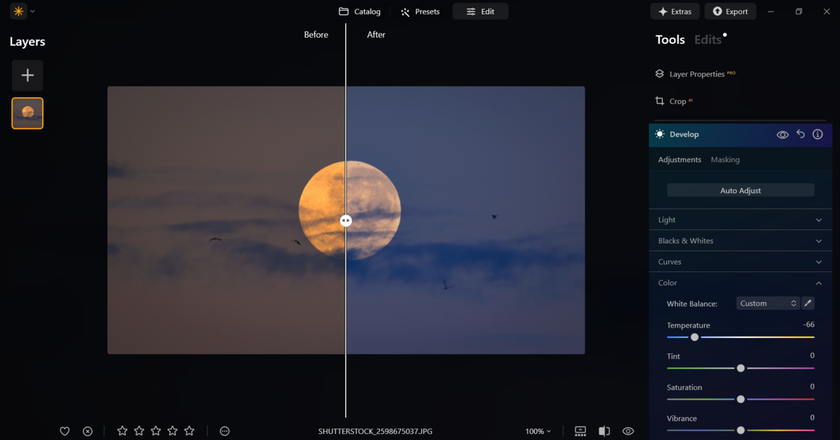
2. Fine-tune exposure: Lower the exposure slightly (–0.2 to –0.5 EV) to keep bright craters from blowing out. Don’t crush the shadows — keep subtle gradation in the darker maria.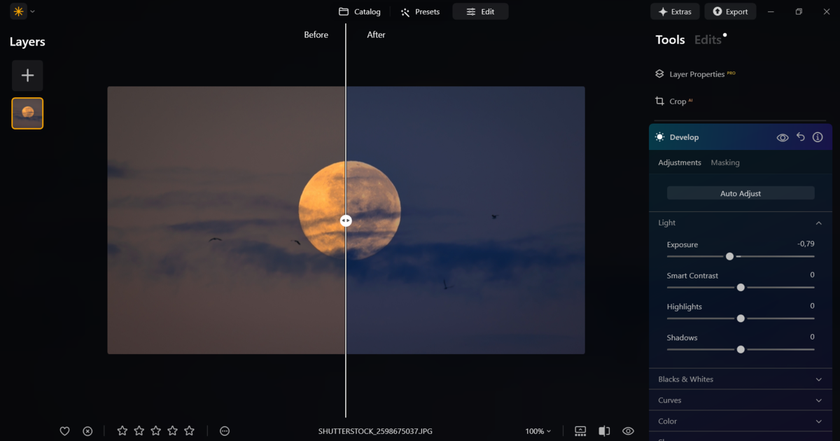
3. Add local dehaze: Use a small dehaze boost (around 5–20) along the Moon’s edge to enhance contrast. Watch for halo rings; less is more.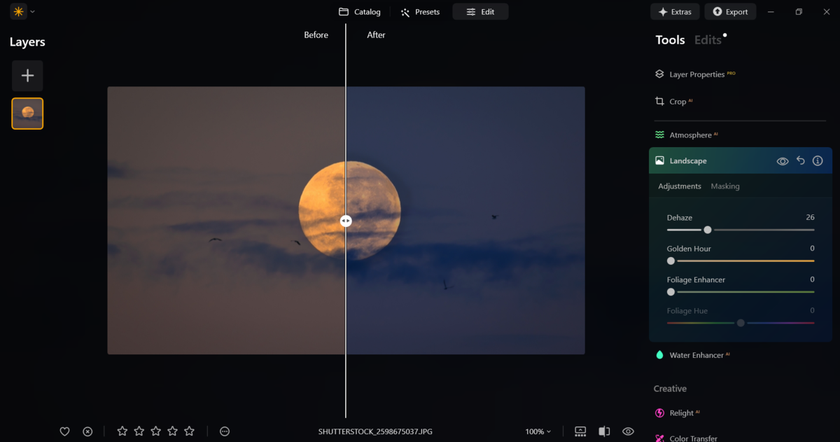
4. Bring out texture: Apply clarity or structure locally (around 5–15) over the maria and crater rims. This sharpens real texture instead of adding noise.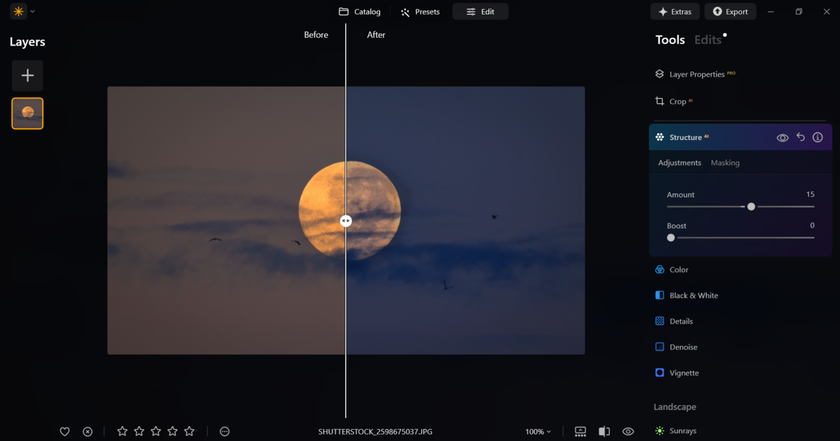
5. Smooth carefully: Reduce luminance noise slightly (5–20) to keep the sky clean but avoid the “wax paper” effect on the Moon’s surface.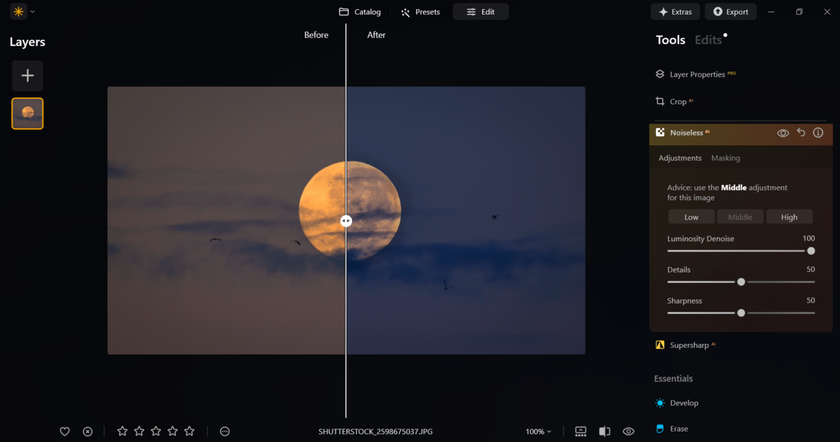
6. Sharpen the final image: Use a small radius (0.3–0.6) and low amount to refine edges. A light touch keeps details crisp without halos.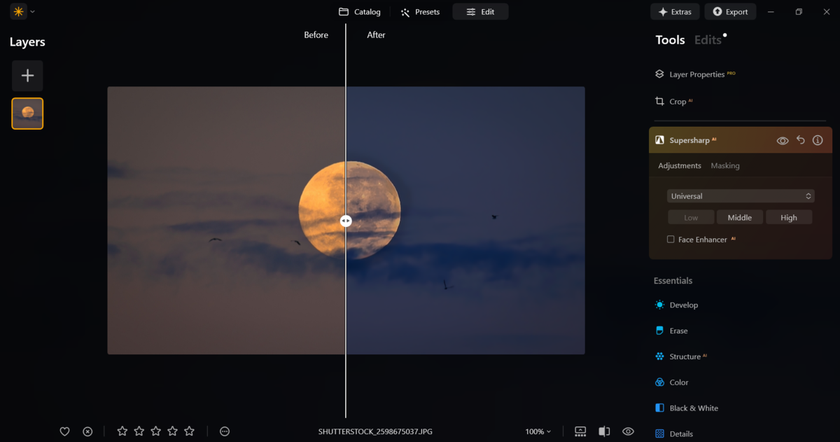
Finish with a subtle vignette to keep focus on the Moon, and if the frame is small, upscale carefully before final sharpening.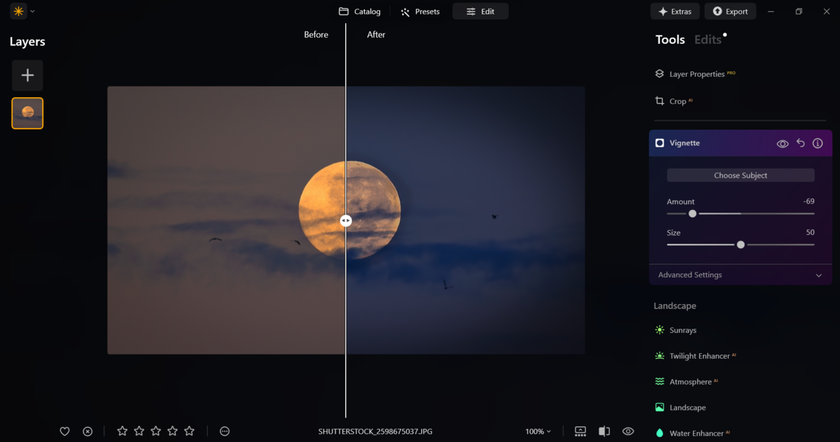
Beyond the Moon—Scenes, Stories, and the First Steps Into Stars
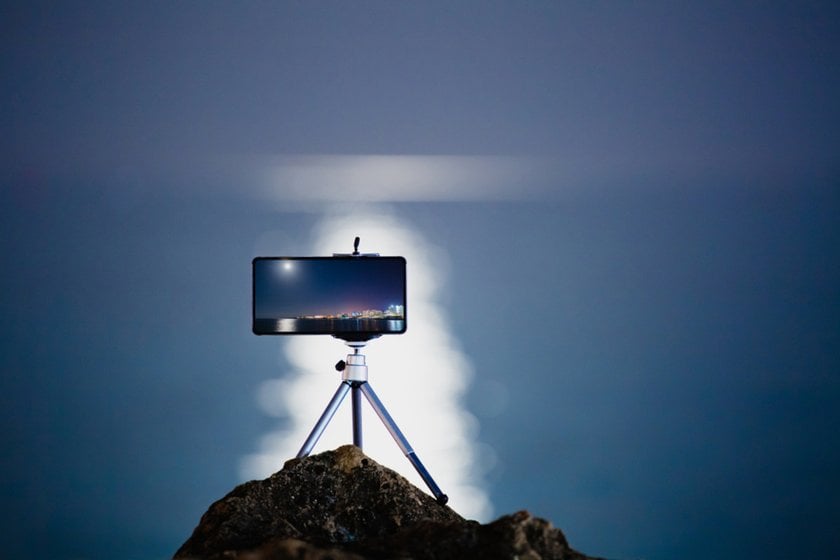
A single Moon against a black sky is a technical exercise; a Moon with context is a photograph. Plan for moonrise behind a skyline, a lighthouse, a hilltop tree—anything with scale. Expose for the Moon first, then lift the foreground later from a darker bracket. Reflections over water work beautifully on calm evenings, and thin clouds can act as a natural diffuser that shows the Moon’s glow without erasing texture. This is still how to take pictures of the moon with a cell phone, just with stronger storytelling baked in.
When curiosity turns upward, bring the same discipline to starlight. Use a wider lens, focus at infinity with magnified live view, and keep exposures short enough to avoid trails. For a complete primer on framing constellations, setting shutter limits, and balancing sky color, bookmark this next step—how to take pictures of stars. The habits that made your Moon crisp—stability, controlled exposure, gentle edits—translate perfectly to the rest of the night sky.
 >
>
