What Is ISO In Photography: Detailed Explanation With Examples
September 08, 2025

If you’ve ever wondered what does ISO mean in photography, it’s simply your camera’s sensitivity to light — a setting that directly shapes how bright or grainy your photos appear.
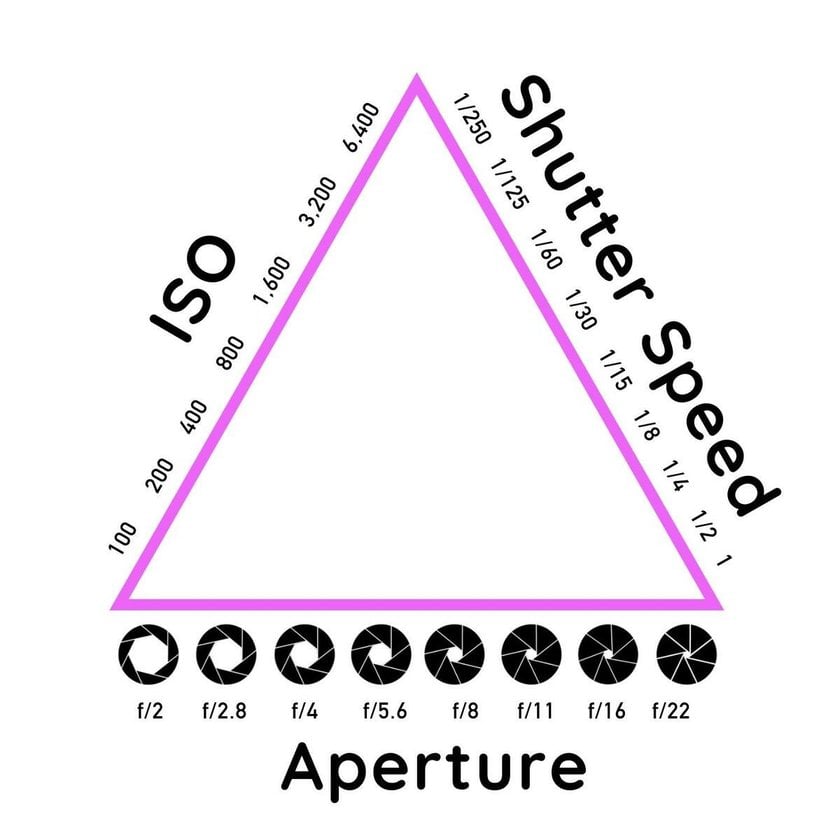
When I first picked up a camera, ISO felt like a mysterious number on a dial — something photographers whispered about but rarely explained simply. Over the years, I learned ISO is one of the three pillars of exposure (alongside shutter speed and aperture) and, more importantly, a practical tool.
Here, I’ll walk you through ISO, show real settings I use, and give clear examples so you can control exposure instead of letting the camera guess.
ISO explained
Many beginners ask me, “What does ISO stand for in photography?” It actually comes from the International Organization for Standardization. ISO is the sensitivity of your camera’s sensor to light — think of it as the sensor’s willingness to “notice” light.
I treat it like a volume knob: low settings make the sensor less eager (clean images in bright light), higher settings make it more eager (brightening the scene when light is scarce). When I shoot outdoors on a bright day, I pick a low ISO so the sensor doesn’t overreact; in dim interiors, I raise ISO so the sensor can catch enough light without forcing me to slow the shutter and risk motion blur. A concrete example I use all the time: shooting a portrait at f/2.8 and 1/200s in daylight, I’ll pick ISO 100 — the result is clean and crisp. If I move indoors to a café and want the same aperture and shutter to freeze movement, I’ll bump to ISO 1600, so the shutter stays fast while the sensor compensates for lower light.
On a dim church shoot with only stained-glass light, I once set the lens to f/1.8, used 1/160s to avoid motion, and pushed to ISO 3200. The files had more grain, but the mood and decisive moments were saved.
![What Is ISO On A Camera [Complete Guide] | Skylum Blog(3)](http://media.macphun.com/img/uploads/customer/blog/1757341072/ISO_1600-9723.png?q=85&w=840)
![What Is ISO On A Camera [Complete Guide] | Skylum Blog(4)](http://media.macphun.com/img/uploads/customer/blog/1757341072/ISO_3200-4610.png?q=85&w=840)
Common ISO Values
 The ISO meaning camera term comes straight from film days, when it described how sensitive the film roll was to light. Here are the ISO steps you’ll see on most cameras and what I use them for:
ISO 50–100 — bright sun, tripod landscapes, long exposures with ND filters.
ISO 200–400 — bright shade, cloudy outdoors, general daylight.
ISO 800–1600 — indoor windows, handheld low light.
ISO 3200–6400+ — concert halls, very dim interiors, events where flash is not allowed.
Older photographers still use the term ISO speed, which comes from film speed ratings like ISO 100 or ISO 400.
Two quick lists that helped me when I started:
When to keep ISO low: landscapes, product shots on a tripod, bright portraits.
When to raise ISO: concerts, dim restaurants.
How To Change ISO
Put simply, what does ISO control? It controls image brightness and the amount of visible noise. Changing ISO is straightforward: use the physical dial or the camera menu. On most DSLRs and mirrorless cameras, you press an ISO button and rotate the rear dial; on phones, it’s in manual or pro mode.
A practical workflow I use is to set the aperture for the depth of the field, set the shutter to control motion, and then adjust the ISO to hit the correct exposure. For example:
I want soft background blur for a portrait → aperture f/1.8.
Subject is moving slightly → shutter 1/200s.
If the meter reads underexposed, I raise ISO until the exposure is correct — that’s how to use an ISO in a practical shoot: treat it as the final tweak of the exposure triangle.

When To Use Low ISO
Low ISO is my go-to when I’m in control of light. Examples:
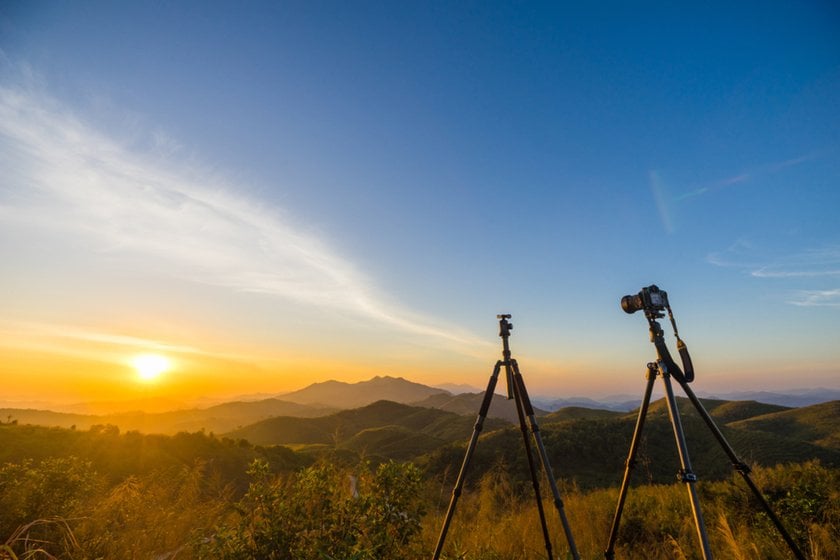
Landscapes from a tripod at dawn: I pick ISO 100, aperture f/11, and a long enough shutter to smooth the water, which is crisp and clean.
Studio portrait with strobes: because flash provides plenty of light I set camera to base ISO to capture the cleanest skin tones. (If you want to lighten a photo after the fact, careful exposure at base ISO gives you more room to edit.)
Product photography: small sensor noise is unacceptable — shoot at base ISO and use reflectors or studio photo lights for even illumination.


Low ISO is not only about quality — it’s about preserving highlights and shadow detail so you have editing control later.
When To Use High ISO
High ISO is for moments you can’t stage. I use it when tempo or restrictions demand it:
Concerts: no flash allowed, fast performers. I might shoot at ISO 6400 or higher to achieve 1/250–1/500s and not miss facial expressions.
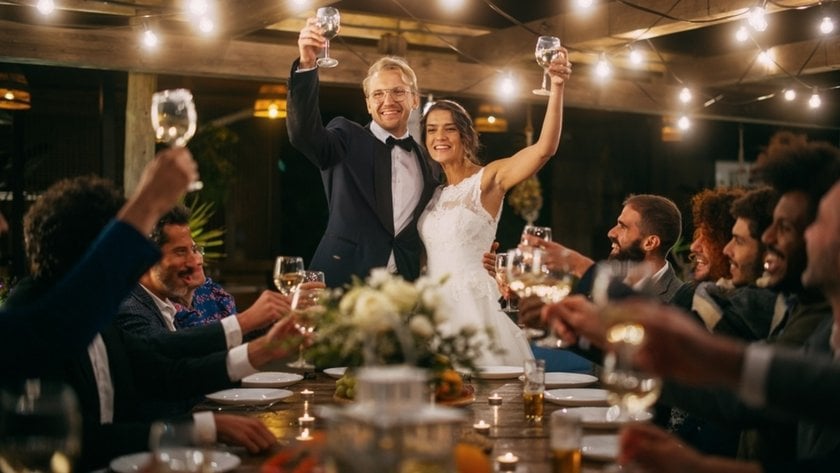
Weddings at evening receptions: to freeze dancing and catch candid moments, you might need ISO 3200 with a fast lens (f/1.8) and careful composition.
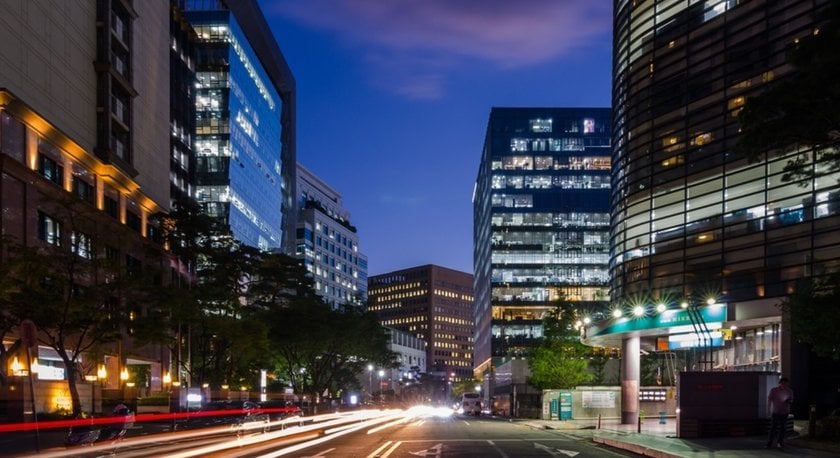
Street photography at night: I intentionally raise ISO to keep myself handheld and unobtrusive. The grain can even add character if handled tastefully.


A specific trick: if I’m shooting video handheld in low light, I increase ISO incrementally and monitor noise on the camera screen. Too high and I lose detail; too low and motion blur kills the clip.
Your AI-Powered Photo Editor for MacOS and Windows
Discover Now!Low vs High ISO Noise Visibility
Technically, how does ISO work? By increasing or decreasing the amplification of the electrical signal from the sensor. Noise looks like grainy pixels, color speckles, or loss of fine detail. With modern cameras, the noise behavior has improved dramatically, but it’s still there.
At ISO 100–400, noise is practically invisible on most modern cameras.
At ISO 800–1600, you’ll begin to see grain in shadow areas, but details remain strong.
At ISO 3200+, noise becomes noticeable and can clip fine textures like hair or cloth.
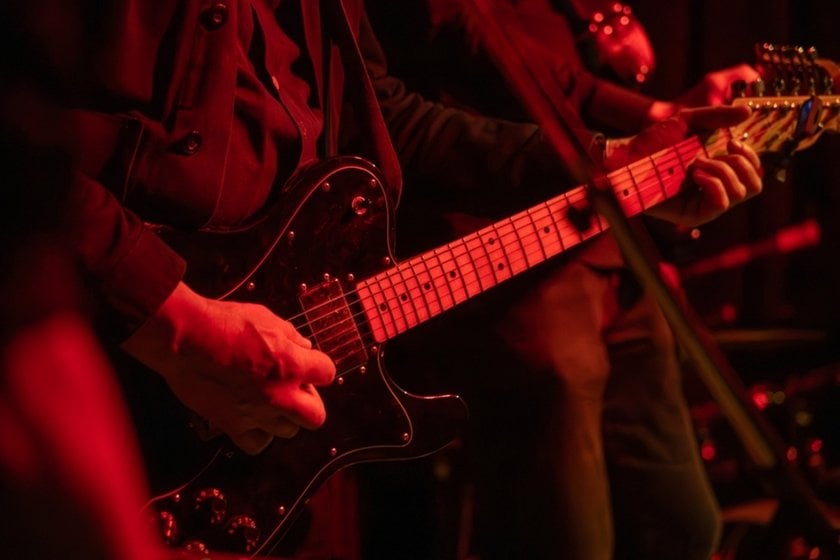
Concrete example: I shot a band in a dim bar at ISO 6400. When I opened shadows in editing, the noise increased, and skin tones looked blotchy. If I’d been allowed to use a small fill flash, I could have kept ISO at 1600 and saved a lot of cleanup work.
Practical Ways to Control ISO Noise
 Noise is inevitable with high ISO, but there are concrete ways to reduce it or make it less distracting.
Practical steps I use:
Expose to the right (ETTR) when possible — slightly brighter exposures can reduce visible noise in shadows. Don’t blow highlights, but aim for a stop over neutral to preserve detail.
Use a fast lens (f/1.4–f/2.8) — more light equals lower ISO. I own a 50mm f/1.8 that I use constantly indoors.
When movement is minimal, use a tripod so you can lower ISO and use longer shutter speeds.
Use noise reduction subtly in post, and avoid aggressive settings that smudge fine details. Modern editing tools can increase contrast and recover perceived sharpness after noise reduction.
Shoot RAW — RAW retains more data and gives noise reduction algorithms more to work with.
For example, for a dim café portrait, I open to f/1.8, set the shutter to 1/125s to avoid motion blur, then choose ISO 800. If that yields too much noise, I either accept a bit of motion blur for better quality or bring a small LED fill.
Darken Your Images to Perfection with Smart Editing Tools
Give it a tryKey Points
If someone asks me for an ISO photography definition, I usually say: it’s the setting that decides how bright or grainy your image will be. ISO is less mystical than it looks — it’s the control knob for how bright the sensor reads the world. As I taught myself, the secret is thinking of ISO as the last step in exposure control: set aperture for depth, set shutter for motion, then adjust ISO for brightness.
Your camera’s modern high-ISO performance is amazing, but knowing when to keep ISO low and when to push it will make the difference between an average snapshot and a deliberate photograph. Practice changing ISO on the fly, test combinations like f/2.8 + 1/250s + ISO 800, and you’ll quickly feel confident choosing the right number for any scene.
![What Is ISO On A Camera [Complete Guide] | Skylum Blog(7)](https://media.macphun.com/img/uploads/uploads/skylum/blog/macbook-for-promo.png?w=50&q=50)