How To Do Burst On Iphone - Don't Miss The Moments
November 21, 2025

Learn how to use color to tell powerful stories through portrait photography. Discover key principles, emotional impacts, and editing tips to elevate your shots.
You know that split-second when the shot happens—a cyclist mid-air, a genuine laugh, a bird catching the wind—and by the time you tap the shutter, it’s already gone. We’ve all been there. As photographers, timing isn’t just important—it’s everything.
That’s exactly where burst mode on the iPhone comes in. If you’ve ever asked, “What is a burst photo?”—it’s a series of rapid-fire images taken in quick succession, giving you a high chance of freezing the moment.
In this guide, I’ll show you how to activate burst mode on your iPhone, manage the shots, and enhance your best picks. Let’s make sure you’re ready for the next blink-and-you-miss-it moment.
What is Burst Mode on an iPhone?
Burst mode on an iPhone is a camera feature that captures a series of photos in rapid succession with just one long press of the shutter button. It’s designed for action-packed scenes—think sports, pets, or anything that moves quickly—where timing is everything.
Instead of relying on a single lucky shot, burst mode gives you a whole sequence to choose from, increasing your chances of capturing the perfect moment. It's a powerful tool for photographers who don’t want to miss a beat.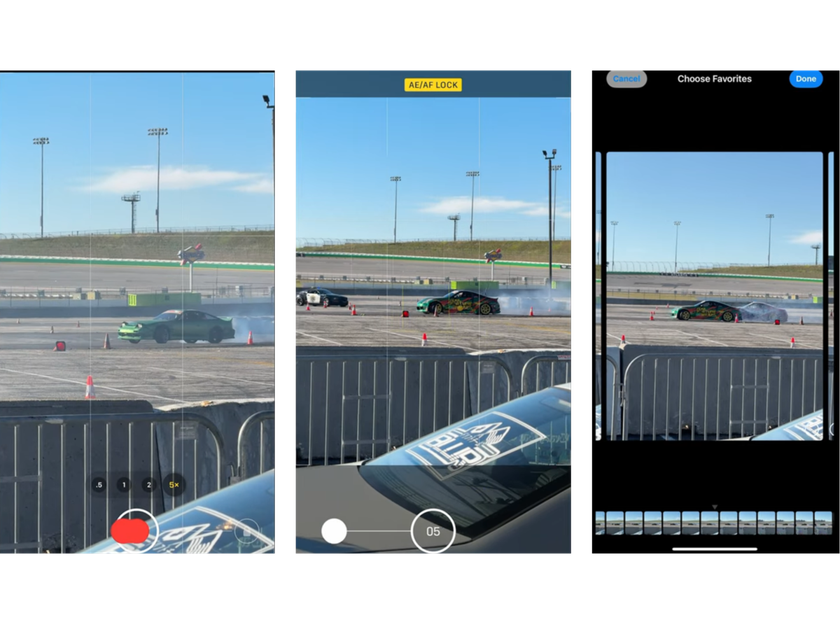
When to Use Burst Mode?
 Now that you know what burst mode is, let's talk about when it’s especially useful. While it’s available anytime, there are certain situations where burst mode truly shines and can make a big difference in your photography results.
1. When You Need to Capture Fast Action
Burst mode is perfect for high-energy moments, like sports events, kids running around, or cars speeding by. By taking multiple shots in quick succession, you boost your chances of freezing the action exactly when everything lines up—sharp, dynamic, and full of life.
2. When You're Shooting in Shaky Conditions
If you’re trying to take photos in a moving environment—like on a bus, a boat, or in the middle of a bustling concert—holding the camera steady can be tough. Using burst mode lets you capture a series of shots quickly, giving you more options to choose the sharpest one later. For even more dramatic results, you can add a moving picture effect afterward with Luminar Neo.
3. When You Want to Try Different Angles
Sometimes, it’s hard to know which angle will tell the best story. Burst mode allows you to quickly capture slight variations in perspective without missing the scene. It's a great trick when you're exploring different compositions on the fly.
4. When You Need Extra Sharp Property Photos
In real estate photography or interior shots, every detail matters. Using burst mode helps ensure you get at least one perfectly sharp image, especially in tricky lighting. And if you still notice slight blur, you can easily enhance sharpness later with Luminar Neo’s Supersharp AI to keep everything looking crisp and professional.
Your Go-To for Seamless Panorama Captures
Explore in Luminar NeoWhen Not to Use Burst Mode
 While burst mode can be a lifesaver in action-packed situations, it's not always the best tool for every shot. Like any feature, it works best when used with intention. Here are a few moments when skipping burst mode might actually serve you better.
1. When Storage Space Is Tight
Burst mode captures dozens of images in a flash—and that means a serious hit to your iPhone or iCloud storage. If you’re low on space, think twice before holding down the shutter. One quick burst can eat up more room than you’d expect.
2. When You Don’t Want to Sort Through Hundreds of Shots
After a session with burst mode, you might end up with a mountain of nearly identical images. If you're shooting something that doesn't require rapid-fire timing, you're often better off taking a single, well-composed photo. It saves time later and keeps your camera roll organized.
3. When You're Practicing Manual Skills
Relying on burst mode too often can become a crutch. Photography is also about slowing down, framing intentionally, and learning how to anticipate a moment. If you're working on sharpening your timing or mastering camera settings, try sticking with single shots—it’ll push you to grow.
Read also: How to Invert a Picture on iPhone: 5 Methods
Using burst mode wisely means understanding when it will help elevate your photo—and when it might just create more clutter. With a little balance, you’ll get the best of both worlds: capturing fast-moving magic and becoming a stronger, more mindful photographer.
How to Use Burst Mode on iPhone
Burst Mode on your iPhone allows you to capture a series of photos in rapid succession, ensuring you don't miss the perfect shot during fast-paced action. Here's how to utilize this feature effectively:
Method 1: Using the Shutter Button
For iPhone XS, XR, and Newer Models:
Open the Camera App: Launch the Camera app from your home screen.
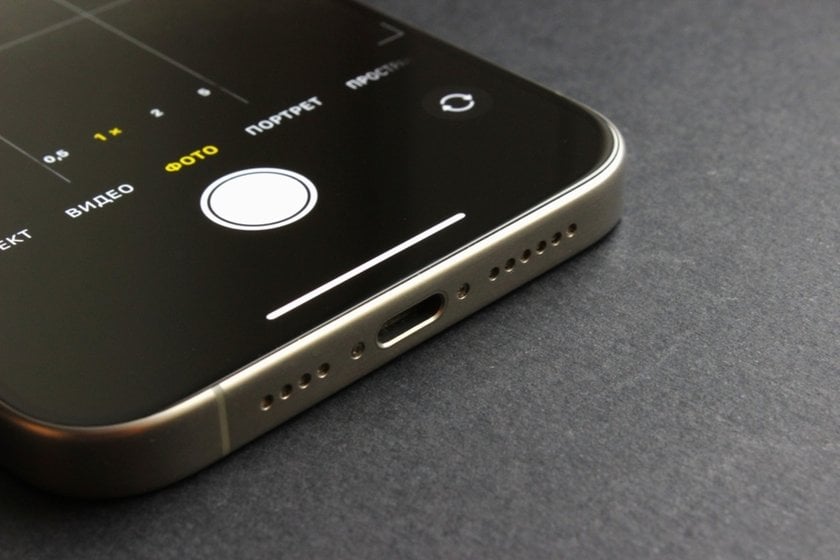
Activate Burst Mode: On iPhone XS, XR, and newer models (running iOS 14 or later), you can capture a burst by quickly dragging the shutter button to the left (portrait) or up (landscape). A simple long press now activates QuickTake video instead, so make sure to swipe rather than hold.
Stop Shooting: Release your finger from the shutter button to stop the burst capture.
Note: On these models, a simple long press of the shutter button activates QuickTake video instead of Burst Mode. Hence, the swipe gesture is essential for Burst Mode activation.
For iPhone X and Earlier Models:
Open the Camera App: Launch the Camera app.
Activate Burst Mode: Press and hold the shutter button. The camera will continuously capture photos until you release the button.
Method 2: Using the Volume Up Button
 For a more ergonomic approach, especially when holding the iPhone in landscape orientation:
1. Enable the Feature:
Go to Settings > Camera.
Toggle on Use Volume Up for Burst.
2. Capture Burst Photos:
Open the Camera app.
Press and hold the Volume Up button to start capturing burst photos.
Release the button to stop.
Note: This feature is available on iPhones running iOS 14 and later.
Method 3: Using the Self-Timer
 The self-timer is useful for group shots or when you want to be in the photo:
1. Set Up the Timer:
Open the Camera app.
Tap the up arrow at the top of the screen to access additional settings.
Tap the timer icon and select a 3 or 10-second delay.
2. Capture the Photo:
Position your iPhone as desired.
Press the shutter button.
After the countdown, the camera often captures a short burst (usually around 10 photos, depending on the iPhone model and iOS version).
Note: By default, using the self-timer results in a burst of 10 photos. To capture a single photo instead:
3. Enable Live Photo: Tap the Live Photo icon (concentric circles) to turn it on. This disables burst mode when using the timer.
Using these techniques, you can capture every piece of the action and choose the best shot later, making sure you never miss those perfect moments!
Read also: Tips for Taking Awesome Night Sky Photos on iPhone
How to See Burst Photos on Your iPhone
 Burst mode is a powerful feature for capturing fast-paced action, but reviewing and selecting the best shots afterward is crucial. Here's how to efficiently view and manage your burst photos:
1. Locate Your Burst Photos
Open the Photos app on your iPhone.
Navigate to the Albums tab.
Scroll down to the Media Types section and tap on Bursts.
Alternatively, burst photos also appear in your main photo library, marked with a stack icon indicating multiple images.
2. Review and Select the Best Shots
Tap on the burst photo you wish to review.
Tap Select at the bottom of the screen.
Swipe through the sequence of photos. Images with a gray dot below them are suggested by the Photos app as the best shots based on focus and composition.
Tap on the photos you want to keep; a blue checkmark will appear on the selected images.
3. Save Your Selections
After selecting your preferred shots, tap Done.
Choose Keep Only Favorites to save only the selected photos and delete the rest, or Keep Everything to retain all images in the burst sequence.
The photos you choose to keep will now appear individually in your photo library, ready for editing or sharing.
Enhance Your Photography with HDR Merge
Get Started NowManaging Burst Mode on Your iPhone
 Managing burst photos helps in conserving storage space and keeps your photo library organized. Regularly reviewing and selecting your best shots ensures you make the most of this feature. Here's how to take control:
How to Avoid Accidental Burst Photos
You can't completely disable burst mode, but you can minimize accidental triggers:
Go to Settings > Camera.
Turn off the option Use Volume Up for Burst.
This stops the camera from taking burst shots when you press the volume up button to snap a photo.
How to Delete Extra Burst Photos
If you have a burst collection and want to clean it up:
Open the Photos app and find the burst photo.
Tap on it, then tap Select at the bottom of the screen.
Choose the images you want to keep by tapping them.
Tap Done, then select Keep Only Favorites to delete the rest and free up space.
How to Share Burst Photos
Sharing burst photos is easy once you’ve selected your favorites:
To share the entire burst: Use AirDrop to quickly send it to another Apple device.
To share individual shots: First, select and save the specific photos you want, then share them through email, social media, or your preferred method.
Conclusion
Now that you know how to take multiple pictures on your iPhone with burst mode, you’re ready to capture every fast-moving moment with confidence. Just remember to manage your shots afterward to keep your storage organized—and picking your best frames is easier than ever.
For that final polish, don’t forget to edit your photos. If you want a simple but powerful way to enhance your images right on your iPhone, check out the Luminar Mobile editor, designed for iOS 17 and higher. It brings professional-quality editing tools into an easy-to-use app, helping your photos truly stand out.
Start experimenting with burst mode today and take your iPhone photography to the next level!