Milky Way Photography: How to Capture Stunning Photos
Last Updated on July 10, 2025
Want to capture the Milky Way in all its glory? Learn how to photograph the night sky with the right gear, settings, and locations.
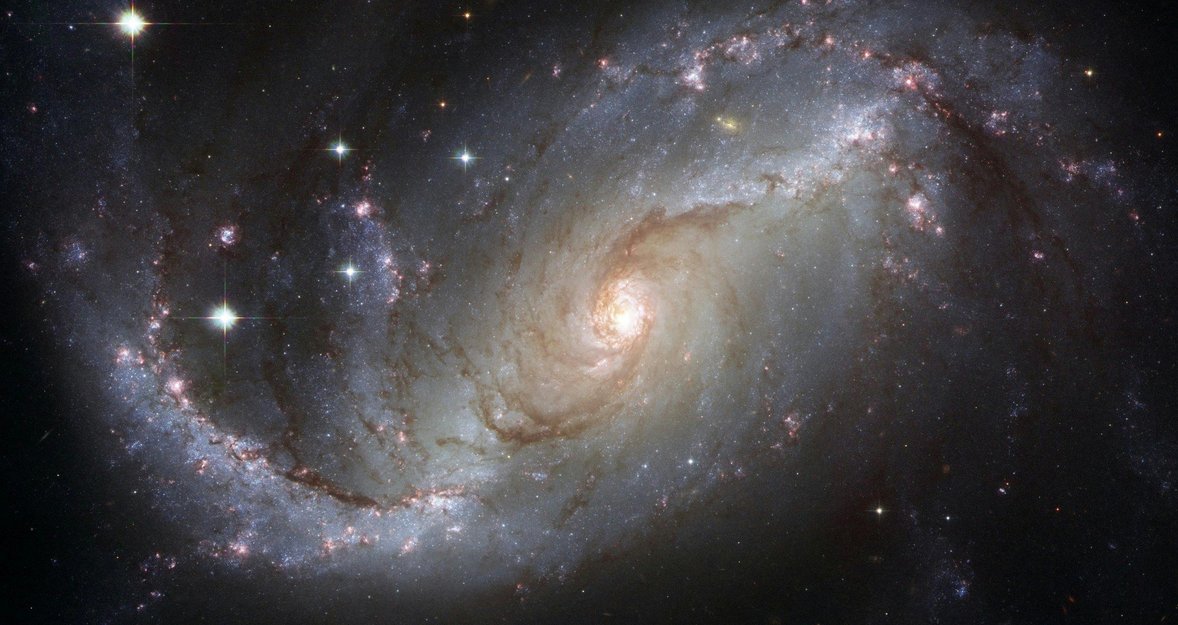
Romance, millions of years of universe growth, and images that are tough for beginners to capture. Of course, everything here is about night photography. Surely, you tried a few snaps in the city, but nothing came out well. Even a good lens will not reveal all the splendor in the photo of the Milky Way. Night sky photos require a more accurate location, and it is best to have an astronomer as a companion. Or simply read the article to find out the thrill of photographing the Milky Way.
Preparation for Taking Milky Way Photo
 Portrait photography necessitates accentuating the model's characteristics. Family snapping is defined by ambiance and coziness. How to photograph the Milky Way? First and foremost, you must decide on the location and principal hurdle.
Why is it So Difficult to Catch the Star's Brightness?
Night photography demands additional lighting in the form of a lamp, flash, or reflector. Depending on the quantity required, you can have a dramatic portrait shot or an artistic landscape photograph. However, when it comes to photographing the Milky Way, the circumstance is slightly altered.
To comprehend the disparities between star’s brightness, we must look to physics. The light from certain luminaries is actually scattered by interstellar gas and dust that exists between us and the star. The light from stars that are not scattered originates from nearby stars, reducing the possibility of it being blocked by interstellar matter.
Exclusive Tools of Endless Possibilities in One AI Editor
Explore Now!On average, the space between us and the nearest star is relatively empty, with only one Hydrogen atom per cubic meter of volume; therefore, there is little interstellar matter to scatter starlight.
In addition, the Earth's stratosphere and atmosphere can reflect light. Consequently, more light is dispersed. As a result, the further away the star, the less intense the light reaches the stratosphere and the lower the brightness observable in Ohio or Colorado. For photographers, this will mean the need to remove noise and blur from photos. You have often noticed that some stars appear as blurred diamonds, haven't you?
Where to Find the Best Location?
For Milky Way night photography, urban locations are generally unsuitable. The primary obstacle in composition is light. Streetlights, traffic lights, and light in windows cause interference, distorting the natural brightness of the stars. As a result, instead of dazzling lights, the images display pale dots. Expanding the scale merely exacerbates the problem. Thus, the best locations are:
Atacama Desert, Chile;
Canary Islands, Spain;
Grand Canyon National Park, USA;
Hawaii, USA;
International Dark Sky Reserve, New Zealand.
When selecting the ideal location, three factors must be considered: the openness of the area, a lack of unnecessary light sources, and the existence of an elevated area (hills). The latter allows you to be less choosy about equipment and find the best panorama views.
Top Gear Equipment for Milky Way Photography
 To shoot the Milky Way, you don’t need the priciest setup, but you do need the right tools. Your camera and lens will determine how much detail and light you can capture from the night sky.
A full-frame camera with manual controls is ideal. It should allow you to shoot at high ISO levels (such as 3200 or higher) with minimal noise. Both mirrorless and DSLR cameras work — they must perform well in low light.
Lens. Go for a wide-angle lens with a fast aperture, ideally f/2.8 or wider. A 14 mm to 24 mm range helps capture more sky in one frame.
Tripod. A solid tripod is a must. Even a slight shake can ruin a long exposure, so make sure your tripod stays steady, even in light winds.
Remote shutter or timer. This feature avoids the need to touch the camera and shake it when pressing the shutter. If you don’t have a remote, use a 2-second timer setting.
Star tracker (optional). If you're ready to take it further, a star tracker enables longer exposures without star trails. That means brighter, cleaner Milky Way shots.
Editing software. Most photographers use Lightroom or Photoshop to bring out the detail in their shots. However, if you’re just starting out or don’t want to pay for software, there are free alternatives to Photoshop, such as GIMP or Darktable. These allow you to adjust contrast, curves, and color with just as much precision.
In fact, many beginners and even experienced hobbyists get excellent results by using a free alternative to Photoshop, especially for tasks like stacking images or adjusting tones to make the Milky Way pop. With the right gear and a bit of practice, your shots can go from blurry stars to frame-worthy night skies.
Cameras and Lenses
However, even such devices cannot compete with the night sky. It demands its particular approach and electronics. The Olympus OM System OM-1 and OM-2 are great options. Live Composite displays the produced image in real time on the screen.
Set the standard exposure (for example, shutter speed 15 seconds, f/4, ISO 3200), then press "Start" to enjoy the splendor of a meteor shower or the first apparition of stars. Stop when the composition appears appropriate to you. The following cameras could possibly be suitable:
Canon EOS R6.
Nikon D3400.
Fujifilm XT-2.
ZWO ASI2600MM Pro.
HQYCCD MiniCam8 Deep sky combo.
A broader range of view reduces the shifting motion of the stars, causing them to appear as points of light rather than trails. The longer your lens' focal length, the faster your shutter speed must be to freeze the rotation and make the stars appear as points of light.
What best lens should you choose if you want to use focus stacking for Milky Way photography? Ultra-wide focal lengths, such as 14-16 mm on a full-frame camera or 10 mm on an APS-C camera, will capture the majority of the Milky Way photo, but the core holding its most notable gases will be less visible.
Alternatively, a narrower focal length, such as 24 mm or 35 mm on a full-frame camera or 16-22 mm on an APS-C camera, will highlight both the main gasses and foreground components. Those will be viewing a smaller section of the night sky.
Stability and Accessories
When you’re shooting the Milky Way, even the slightest wobble can blur the stars. A reliable tripod with a wide base and firm grip is essential. If you’re on uneven ground, use a tripod with adjustable legs for stability. Don’t forget to turn off image stabilization on your lens or camera when it's on a tripod: it can cause tiny shakes during long exposures.
Other tools can make things easier. A headlamp with a red light helps you see in the dark without ruining your night vision. Extra batteries are a must: cold nights drain them fast. And if you’re editing your shots later, you might want to remove the background from the image to isolate the sky.
Camera Settings and Techniques
 Getting your settings right makes all the difference when you're out shooting stars. Since there's so little light at night, your camera has to collect it over time. That’s why long exposures, wide apertures, and higher ISO values are common. But it’s a balance: you want brightness without blowing out the stars or adding too much grain. Manual mode is your friend here.
Below are the most common starting points for Milky Way photography. You can adjust them according to your gear, sky conditions, and personal preference.
Setting | Recommended Range | Why It Matters |
Shutter Speed | 15-25 sec (full-frame) | Longer time lets more light in, but too long causes star trails |
Aperture | f/2.8 or wider | A wide aperture gathers more starlight quickly |
ISO | 1600-3200 | Boosts light sensitivity but can add noise |
Focus | Manual, set to infinity | Autofocus won’t work in the dark: pre-focus during twilight |
White Balance | 3500-4000K | Gives the sky a more natural tone, avoids color cast |
Image Format | RAW | Keeps more data for editing later |
The first few shots are often test shots. Check your histogram, zoom in to see if the stars are sharp, and tweak settings until the photo looks the way you want. Even a tiny change in lower ISO or aperture can shift the mood of the final image.
Tips for the Best Night Photography
Taking photos in the dark is not always pleasant; it requires a lot of time and high-quality equipment, as well as some additional accessories. Sometimes, the sky replace function can remedy the situation, but to avoid resorting to such methods of photo improvement, we will share a few useful tips.
Find places with low light pollution. The closer you are to places with a large cluster of streetlights, the worse the Milky Way can be seen, and its color palette is unnatural. The best places to organize such photo shoots will be fields outside the city or mountainous areas. The main rule: “the darker the better”.
Speaking of darkness, since there is almost no light there, the photo will be too dark; the solution is a long exposure. It takes time, and no one wants to stand completely in the dark in the middle of the field. In any case, it's not a good idea to turn on a flashlight at this moment because we will be the source of the light if we are going to be the source of it. The solution will be a red flashlight because modern cameras catch mostly blue and green light. You don't have to worry that it will interfere with the shooting, and you won't trip over an unfortunate stone.
It is also worth keeping an eye on the phases of the moon because it is the most powerful source of light you will have. Its phases will directly affect the final result. For example, during a full moon, there is not much light for the stars to be visible, and the waning or waxing moon creates a haze in the sky. Ideal shots will come out in the new moon or at times when it does not rise above the horizon.
Everyone remembers that the location of the Milky Way changes with the seasons. This is a view of our galaxy from the inside, a dense belt of dim light where several spirals overlap. In summer, we see the center of our galaxy, while in winter, the planet turns, and we see only the thin fringes. That's why events like this are better planned during the warmer seasons. Apps like PhotoPills or Stellarium will point out the dates and locations where it will be best seen.
Taking a single photo, even with perfect settings, can result in noise. To correct this situation, try taking a series of similar images (10-20) and then combining them in the program, thereby improving the quality. You can also take a couple of foreground shots to add volume.
Each of these tips won't make the photo for you, but they will help you improve it a bit. To achieve great results, you need to select the right location, organize the shot, and employ technical techniques such as bracketing and overlapping.
Tutorial of Group Photos and Camping-Style Images
 Milky Way photography doesn’t have to be limited to wide, empty skies. Adding people or a cozy camping scene can make your shots more personal and relatable. Group photos and camping-style images create a strong connection between the viewer and the scene, especially when taken under a sky full of stars.
The trick is to balance exposure so the people, tent, or campfire don’t get overexposed while still showing the night sky clearly. Use soft light sources like dim lanterns or headlamps, and try slightly shorter shutter speeds to keep human subjects sharp.
If your friends have decided to support your photography hobby, and you're already setting up tents and gathering friends, it's time to add group photos to your gallery. Here are some interesting options:
The group is in a tent. Take a shot of your friends peeking out of the tent with flashlights in hand. You can take a mock photo. Someone will decide to shine a light on their face from below and portray a scary grimace.
Draw with flashlights. Having exposed the shutter speed, ask your friends to hold flashlights in the air as if they were writing or drawing something, apply your imagination.
Shadows around a campfire. Have someone gesticulate to create funny shadows, like when you were a kid with a flashlight.
Smoke from a campfire. Have one of your friends gently blow smoke from the campfire while you photograph the stars, and the beautiful smoky patterns in the photo.
Torches. They have always been associated with fire and adventure, so why not replicate a similar atmosphere in your group photos?
If you have a bad background in a few photos, you can edit it. The app to change the background will help you with this. Don't forget that there are many more interesting ideas for photos. Just take pictures that you like.
Including people or camping gear in your Milky Way shots adds a sense of scale and story. A glowing tent, a silhouette by the fire, or a group looking up at the stars turns the image into something more than just a sky photo: it becomes a shared moment.
These compositions are more challenging but worth it. Use lighting carefully, pose with purpose, and adjust your settings to balance the subject and sky. With some practice, these types of shots can become your most memorable ones.
Does NASA Try to Get the Milky Way Shooting?
 Even though Copernicus and Galileo's disciples attempted to show our galaxy in celestial atlases, the reality differs slightly. After 1976, when that renowned image was taken from the Moon, the development of the Hubble telescope and the establishment of the Hawaiian Observatory would have made full-frame Milky Way photos possible. Or will it?
"To get [the Milky Way photography], a spacecraft would have to travel either up or down from the disk of the Milky Way and travel so incredibly far," explained Alexandra Doten, former NASA space analyst. “But that doesn’t mean we’re totally in the dark about what the Milky Way looks like. When you look up at the night sky, most of the stars you see are part of our galaxy.”
Your AI-Powered Photo Editor for MacOS and Windows
Discover Now!“For the first time, we have direct images of what the Milky Way looked like in the past,” said Pieter G. van Dokkum of Yale University in New Haven, Conn.
“Of course, we can’t see the Milky Way itself in the past. We selected galaxies billions of light-years away that will evolve into galaxies like the Milky Way. By tracing the Milky Way’s siblings, we find that our galaxy built up 90% of its stars between 11 billion and 7 billion years ago, which is something that has not been measured directly before.”
Advanced Astrophotography Post-Processing Techniques
 Capturing the Milky Way is just the start. What you do in editing can take your shot from decent to wow. The goal is to bring out the detail without making the image look fake. Careful post-processing helps balance the light, bring out texture, and mitigate the noise that often occurs when shooting in low-light conditions. Every photo has hidden data you can work with, adjusting it the right way, step by step.
You don’t need complex tools to get great results. Even user-friendly software like Luminar Neo can handle advanced adjustments such as exposure blending, structure control, and selective edits. With time, you’ll learn to spot exactly what your image needs, whether it’s more detail in the shadows or a more balanced sky tone.
Noise Reduction and Star Detail Recovery
Night sky photos often come with digital noise, especially if you’ve used a high ISO. The trick is reducing this noise without smudging the stars or losing faint details. Start with noise reduction tools and apply changes slowly: small tweaks usually work better than heavy adjustments. Zoom in while editing to ensure stars remain sharp and clear.
Another method that helps is stacking. You blend several identical exposures of the same scene to cancel out random noise and preserve the star points' crispness. Programs like Sequator or DeepSkyStacker are popular for this task, especially when working with RAW files. Any shift will blur the result.
After that, focus on the star detail. Boosting local contrast, using light sharpening, and adjusting clarity can make a big difference. Some tools, including Luminar Neo, enable you to target specific areas in the photo, allowing you to sharpen stars without affecting the background sky. The goal is always the same: to achieve clean results that maintain a natural and balanced feel.
Let's Move Around Your Space
 To photograph the Milky Way well, you need the right combination of gear, technique, and editing. Use a full-frame camera with manual controls, a wide-angle lens with a fast aperture, such as f/2.8, and a stable tripod. Keep shutter speed around 15-25 seconds and ISO between 1600 and 3200. Focus manually at infinity and shoot in RAW format to keep more detail for editing.
Stability is essential. Use a remote or timer to avoid camera shake. A red headlamp, extra batteries, and basic accessories can make your session run more smoothly. If your background is off, you can always fix it later using editing tools.
Post-processing brings your photo to life. Start with noise reduction and star sharpening: stacking multiple exposures helps reduce grain without losing detail. Adjust the contrast, exposure, and color carefully to maintain a natural appearance in the sky. Software like Luminar Neo is great for adjusting fine details and correcting problem areas without much effort.
Good Milky Way photography doesn’t need complicated setups. What matters most is knowing your tools, setting them up properly, and taking time to edit with care. The more you shoot, the faster you’ll spot what works. And when it clicks, your photos will speak for themselves.
FAQ
What’s the minimal gear needed for decent results?
You’ll need a camera that allows manual settings, a lens with a wide aperture, and a stable tripod. Using a remote shutter or the timer function helps avoid movement. With just these, you can already take some surprisingly sharp and detailed shots.
Can I shoot the Milky Way in urban areas?
You can try, but strong light pollution will wash out much of the detail. You may only see a faint glow instead of full star clusters. To get better results, head outside the city: ideally to a dark-sky location, where the Milky Way becomes much clearer.
What’s the ideal ISO setting at night?
Most modern cameras handle ISO 1600-3200 quite well. If your camera handles noise well, go higher. Too low, and your image will be too dark; too high, and it’ll get grainy. Test different levels during your session.
How do I calculate exposure without star trails?
Use the “500 rule”: divide 500 by your lens’s focal length. For example, with a 20 mm lens, you get 500 ÷ 20 = 25 seconds. This gives a rough limit before stars begin to trail. It’s a helpful guide, though results may vary depending on the sensor type.
What’s the best shutter speed for Milky Way photos?
For full-frame cameras, stick to 15-25 seconds; for cropped sensors, try 10-20 seconds. These ranges help you capture enough light without turning stars into short trails. Exposure times are too long, and stars will start to blur due to Earth's rotation.


![Best Camera For Family Photography [Reviewed By Photographer]](http://media.macphun.com/img/uploads/macphun/blog/3921/xipo.png?q=75&w=1348&h=715&resize=cover)