What's The Best Outdoor Portrait Photography Settings
July 14, 2025
Learn the best camera settings for outdoor portrait photography. Discover how to use natural light, adjust ISO, aperture, and shutter speed for beautiful results.
Anyone who takes pictures recognizes that the effect of "live shooting" is best created beyond the studio. Parks, alleys, cafeterias, and backyards have long been hot spots for photography enthusiasts to perfect their craft. At the same time, few know what camera settings for portraits outside are needed. We will talk about this in today's article.
Facing Challenges During Shooting
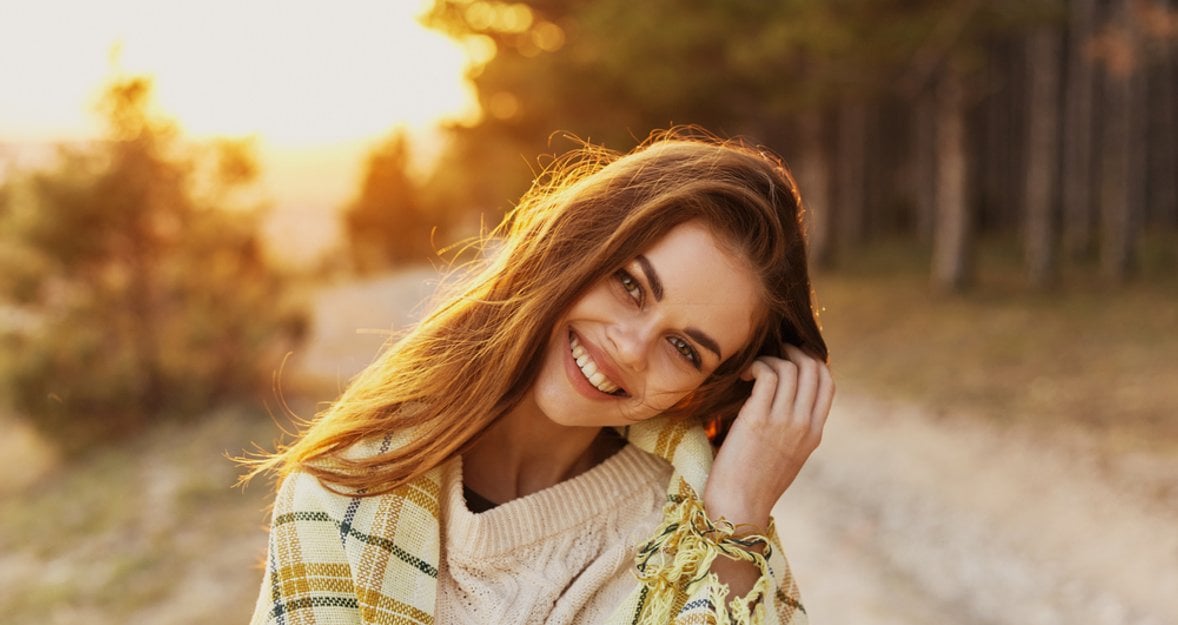
 The sun and wind are the first obstacles you are bound to encounter outside the studio, and even the slightest breeze can cause complications if your models have long or thin hair. If you maintain Japanese movies or jokes from physics lessons about static electricity (when you rubbed a metal ball and your hair stood on end when you touched it), this is roughly the effect you will see during a photo shoot without preparation.
Every photographer's credo is "golden hour." However, when filming outside, this time of day gives an odd hurdle. Warm light, like gloomy sunshine, can alter skin tones. The sinking sun turns orange, then red, and finally pink, before abruptly darkening. Experienced ones feel the anguish of having a wonderful portrait session spoiled by the rays of the setting sun. The skin turns so reddish-brown that it is tough to fix in post-processing without making the backdrop look strange. Even if it simply images for friends, you don't want them to resemble the Simpsons after a tanning bed.
Your AI-Powered Photo Editor for MacOS and Windows
Discover Now!Among the other factors, one stands out the most: insects. When shooting in the countryside, you can't avoid encountering them. Some models are hesitant to come to the point owing to this, and the majority of photos must be repeated due to human nature, the Bokeh effect, or a damaged frame. It doesn't matter if it's a butterfly, grasshopper, or ant. Everyone should be comfortable during both the post-processing and the session. Therefore, it is necessary to select the best camera settings for outdoor portraits, so that even a random shot becomes a masterpiece.
Let Your Camera Work Correctly
 How to really photograph? In one of her interviews, Belgian photographer, and one of the first Magnum members, Martine Franck said: "What I am really looking for when I am photographing a person is the light in their eyes, the glint, their expression, their hands — their hands are very important.". In order for your photos to have a similar effect, let's take a closer look at the equipment settings.
Aperture
A camera's aperture number determines how much light can pass through the lens. Apertures are measured in f-stops, which seems contradictory, considering that as the f-stop grows, the area through which light passes drops. The table below contains metrics and explanations for what best fits your style.
Diaphragm’s f-size | Description |
f/1.8 - f/4 | Strong background blur. |
f/1.8 | Great for artistic portraits with background blur. |
f/2.8 | Portraits with smooth Bokeh. |
f/4 | Shots with background to be a little clearer. |
f/5.6 | Captures with more details in focus. |
f/8 | Outdoor close-up (a person against a landscape background). |
It is more convenient to utilize aperture priority mode (AV) or manual mode (M). Aperture priority (AV) allows you to manage the level of field while the camera determines the shutter speed. Manual mode (M) provides complete control, which is especially beneficial in continuously changing illumination.
ISO
Unlike aperture, the lowest ISO is usually eternally preferred, as upping ISO considerably boosts visible noise. As a result, the ISO number is raised solely for circumstances where the required angle and shutter speed are otherwise unavailable.
Bright day: ISO 100;
Cloudy day/shadow: ISO 200-400;
Sunset: ISO 800-1600 (depending on the camera).
Commonly available ISO numbers are 100, 200, 400, and 800, although Canon camera settings for outdoor portraits allow a range of lower and higher values. ISO numbers that vary between 50 and 200 often give acceptable low noise, although ISO levels extending from 50 to 800 (or even higher) can often be acceptable when utilizing digital SLR cameras.
Shutter Speed
A camera's shutter controls whether the sensor is open or closed to light arriving via the lens. The period of exposure influences how long the sensor will remain open. The terms "exposure" and "exposure duration" are synonymous because limiting interaction entails reducing the length of exposure.
The influence of shutter speed for portrait outdoors on irradiation in numbers is the easiest to estimate: it is proportional to the amount of light entering the camera. If the exposure period is doubled, so does the stream of sunlight that enters the camera. We have the following values:
To reduce motion blur, set the minimum shutter speed to 1/200 second or faster.
1/200 is the standard for static poses
1/500 — if a person is moving
1/1000 and more — for active scenes, for example, during jumps.
How do you know what shutter speed will guarantee a sharp handheld shot? Using Nikon camera settings for outdoor portraits, it is easier to evaluate the results on the camera screen (at full zoom). If the picture is blurry even with perfect calibration, you will certainly need to adjust the shutter speed, hold your hands more solidly, or use a tripod.
Focus
Because most parameters remain constant, 35 mm or 50 mm lenses are appropriate for studio portraiture. Outdoor photography is more vivid, so consider 50 mm or 85 mm models. It depends on the proportion of the background you want to show in the frame. A long-focus lens helps to separate and focus on the topic. Actually, that's why the shooting is termed "portrait".
Autofocus performs well with a point focus selection (One-Shot AF + Single Point AF), ensuring that the sharpness is precisely on the model's eyes. Assume that the model is not moving. If the shot is in motion (children, animals), select Expand AF Area. For group portraits, immediately select Expand AF area mode.
Bet You Haven’t Known That
 Surely you've observed that at midday, when the sun is at its highest point, it's tough to picture anything worthwhile. All items don't look their best (due to the contrasting light and dark patterns). When a person stands with their back to the sun, it is very challenging to get a good portrait due to the intense shadows in the eye area.
The human component causes you to wince when direct light strikes your retina, which affects the quality of the shot. Furthermore, the temperature will be a concern, necessitating the use of extra bottles of water and a towel during preparation. The equipment will require external protection against overheating. But even so, it is possible to make some cool sets. To do this, follow these recommendations.
Use light reflectors to soften shadows or, conversely, highlight dark areas.
Pay attention to the background; it should not be distracting.
Avoid overexposure, as it will be harder to fix in post-processing.
Take shots in RAW to have more editing options.
Buy a flash or a photo lamp if the light is not enough or the shooting is delayed until dark.
If the photo comes out too cold or warm, you need to manually select the white balance.
What should be the camera settings for sunny day portraits? Begin with an aperture of f/8 or f/16 and a shutter speed that is the inverse of the ISO setting. For example, if the ISO is 200, the shutter speed will be 1/200 second. If the shadows are clearly contrasting, utilize manual mode and take a few test images. Alternatively, widen the aperture to f/5.6 or f/4. Assuming these precautions do not work, find a darker spot (such as under an oak tree or near a pond) and snap a quick set of photographs.
How to Make Perfect Group Photos?
 People feel more natural and secure when photographed alone. However, in the case of a group shot, dysmorphophobia (fear of being ugly), scoptophobia (fear of ridicule), or a photographic symptom, which has been addressed since 1906, may arise. As a result, during the session, while still at the place, address all the topics and questions that the clients might have.
As for equipment and settings, everything is quite simple here. Choose cameras with good framing, a wide ISO range, and several lenses. Use the following characteristics of aperture:
f/4 – f/5.6: for small groups (2-3 people, when everyone stands in one line);
f/5.6 – f/8: for a company (4-6 people or when people stand in two rows);
f/8 – f/11: for large groups (more than 6 people or if they are arranged in several rows).
It is worthwhile to place people on the same plane; the more they are "stretched" into the dimension of the frame, the trickier it is to keep everyone in perspective. Focus on the row of faces nearest to the camera; at f/8-f/11, the extent of focus is adequate to capture anyone. You should also avoid using a wide aperture (f/1.8 - f/2.8), as someone will undoubtedly be blurred.
Luminar Neo: A Tool That Upside-Down Regular Photography Editing
 Even if you follow all of the camera settings, live shooting will result in shadows, a broken composition (broken frame), or glare in the image. As a result, employing a high-quality image editing software, such as Photoshop, for post-processing is highly desirable.
Exclusive Tools of Endless Possibilities in One AI Editor
Explore Now!Luminar Neo is a stylish multi-tool from Skylum that lets you edit and alter multiple layers and objects. As a result, when you ultimately give the images to the customer, you will be passing on their smile. Always bear in mind that the first click gives luck, while the last brings good memories!


